

Basement Remodeling: 7 Things to Check Before Finishing Your Basement
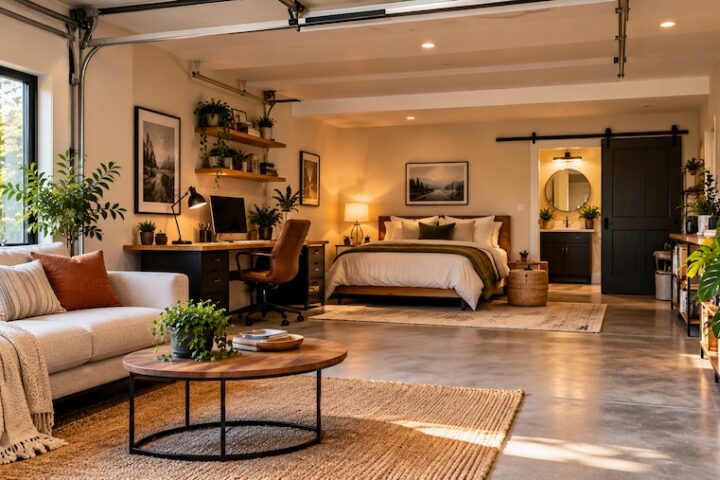
A basement can be one of the most valuable spaces in your home, yet it is also one of the easiest to get wrong. With the right planning, an unfinished basement can become a comfortable family room, a guest suite, a home office or a dedicated playroom. It can even add to your home’s appeal when it comes time to sell.
But before you start framing walls, installing flooring or picking paint colors, take a closer look at what lies beneath the surface. Moisture, poor ventilation, low ceilings and outdated wiring can turn an exciting renovation into an expensive headache.
The key is to address the practical issues first and think about finishes later. Here are seven things to check before turning your basement into usable living space.
One important note: This guide offers general information. Requirements for indoor air quality, electrical work, plumbing and emergency exits vary by property and location. Consult qualified professionals and your local building department before starting work.
1. Check for Moisture Before Anything Else
Moisture is one of the biggest obstacles to a successful basement renovation. Because basements sit below or partly below ground level, they are more vulnerable to water intrusion, condensation and damp conditions than most other rooms in the house.
Start by inspecting the walls, floors and corners for water stains, peeling paint, bubbling surfaces or white, powdery deposits on masonry. A persistent musty smell can also indicate a moisture problem, even when there is no visible water.
Pay attention to the outside of the house, too. Clogged gutters, leaking downspouts, poor drainage and ground that slopes toward the foundation can all direct water where you do not want it.
Before covering the walls or installing new flooring, identify and correct the source of the moisture. Depending on the problem, this may involve improving drainage, extending downspouts, correcting the grading around the foundation or repairing a leak.
Covering a damp wall with drywall or laying flooring over a wet concrete slab will not solve the underlying issue. It can conceal damage and create conditions that encourage mold growth. A dry, stable basement is the foundation of every successful remodeling project.
2. Pay Attention to Air Quality and Ventilation
A basement may look clean and dry while still having an indoor air quality problem. Limited ventilation, moisture and certain gases can affect how comfortable and healthy the space is to use.
Before spending money on finishes, consider having the basement assessed for relevant air quality concerns. Radon deserves particular attention in areas where it is a known risk. This naturally occurring radioactive gas can enter buildings through openings in the foundation, and testing is the reliable way to determine whether levels are elevated.
If you notice persistent musty odors, visible mold or unexplained dampness, investigate the cause rather than trying to mask the smell with air fresheners or paint.
Ventilation and humidity control also matter once the basement becomes a regularly occupied room. Depending on the conditions, a dehumidifier, improved air circulation or a professionally designed ventilation solution may be appropriate.
The goal is not simply to make the basement smell fresh. It is to create an indoor environment that remains comfortable and suitable for everyday use.
3. Measure Ceiling Height and Plan the Layout
Before deciding what your basement will become, measure the available space carefully. A basement can have plenty of floor area but still feel cramped because of low ceilings, exposed beams, plumbing lines or heating and cooling ducts.
Measure the ceiling height in several places, paying particular attention to areas where pipes and ductwork reduce the available headroom. These details can influence everything from the placement of furniture to the type of lighting you can install.
Next, sketch a basic floor plan. Mark the stairs, support columns, windows, utility equipment, plumbing connections and any areas that may need to remain accessible.
Think about how you want to use the space. A family room might benefit from an open layout, while a home office may need more privacy. A guest suite could require a separate sleeping area, storage and possibly a bathroom.
You can also make use of awkward corners rather than treating them as wasted space. Low-ceiling areas may work well for built-in storage, closets or a reading nook, provided the design meets applicable requirements.
A thoughtful layout helps you make better use of the existing structure without paying to create space that the basement cannot comfortably accommodate.
4. Plan for Natural Light and Safe Exits
Basements often receive less natural light than other parts of the house. Small windows, limited daylight and enclosed layouts can make even a generously sized room feel dark.
Where possible, make the most of existing windows and avoid blocking them with furniture or unnecessary partitions. If the layout allows, larger windows or other improvements to natural light may be worth exploring, subject to structural and local code requirements.
Artificial lighting deserves equal attention. Rather than relying on a single overhead fixture, combine general lighting with task lighting and softer accent lights. Recessed fixtures, wall lights and floor lamps can help create a more welcoming atmosphere, depending on ceiling height and the room’s intended use.
Safety is just as important as appearance. If you plan to use the basement as a bedroom or sleeping suite, ask your local building department about emergency escape and rescue openings, window dimensions, window wells and other applicable requirements. Not every basement window qualifies as an emergency exit.
These considerations should be part of the initial design, not something you discover after the walls and finishes are in place.
5. Improve Insulation and Floor Comfort
Basements can feel colder than the rest of the house because their walls and floors are in contact with the ground. Even when the temperature is reasonable, cold surfaces can make the room uncomfortable.
Insulation can improve comfort and energy efficiency, but the right approach depends on the foundation, local climate and existing moisture conditions. Basement walls should be assessed before insulation is installed, since an unsuitable assembly can trap moisture and lead to hidden problems.
Flooring requires similar care. Carpet may feel warm underfoot, but it is not always the best choice where moisture is a concern. Other options, including suitable luxury vinyl flooring, tile or properly designed subfloor systems, may be more appropriate depending on the conditions.
Before selecting a material, consider the condition of the concrete slab, the likelihood of moisture intrusion and the manufacturer’s installation requirements. A moisture assessment may be necessary before certain flooring products are installed.
Also think about heating and cooling. Your existing HVAC system may not be designed to handle the additional living area comfortably. A qualified contractor can help determine whether the current system is adequate or whether adjustments are needed.
A comfortable basement is the result of a complete approach to insulation, moisture management, flooring and temperature control.
6. Plan Electrical, Plumbing and Utility Access
Electrical outlets, switches, lighting, plumbing and heating equipment are easier to plan before the walls are closed. Leaving these decisions until the finishing stage can mean cutting into new drywall, moving fixtures or paying for work that could have been completed earlier.
Start by identifying where you will need outlets and switches. A home office may require additional outlets for computers and equipment, while a family room may need convenient locations for televisions, lamps and charging devices. Electrical work should be completed by a qualified professional in accordance with applicable codes.
If you are considering a basement bathroom, laundry area or wet bar, think about plumbing before finalizing the layout. The location of existing drain lines, water supplies and the main sewer connection can influence the complexity and cost of the project. In some basements, a sewage ejector or other specialized solution may be necessary.
Do not forget the mechanical systems. Electrical panels, shut-off valves, cleanouts, junction boxes and serviceable HVAC equipment must remain accessible where required. Access panels and carefully planned utility enclosures can help preserve a finished appearance without making future maintenance difficult.
The objective is to create a space that looks finished but remains practical to maintain and repair.
7. Understand Permits and Local Building Requirements
A basement renovation can involve more than cosmetic improvements. Depending on the scope of work, you may need permits for electrical changes, plumbing, structural alterations, insulation or the creation of new living areas.
Requirements vary by jurisdiction, so do not assume that a project approved in one town will follow exactly the same rules in another. Contact your local building department early and explain what you intend to do with the space.
Ask whether permits are required, what inspections may apply and whether there are minimum requirements for ceiling height, emergency exits, ventilation, heating or fire protection. If you plan to add a bedroom or create a separate living suite, confirm the relevant occupancy and egress requirements before construction begins.
Budget for permits, inspections and professional assessments alongside materials and labor. These costs are easier to manage when they are included in the original plan.
It is also worth keeping records of permits, inspections and completed work. Proper documentation can be useful for future maintenance, insurance questions and a potential home sale.
The Right Order for a Basement Renovation
Once you have assessed the basement and established a realistic budget, organize the work in an order that minimizes rework.
-
Inspect the basement: Identify moisture, structural concerns and existing utility issues.
-
Resolve water problems: Correct leaks, drainage issues and other sources of dampness.
-
Assess air quality: Arrange appropriate testing and address any concerns.
-
Confirm the design: Finalize the layout, ceiling constraints, lighting and exit requirements.
-
Obtain necessary permits: Confirm the applicable rules before beginning regulated work.
-
Complete electrical and plumbing work: Coordinate wiring, pipes, drainage and mechanical systems.
-
Install insulation and moisture-appropriate assemblies: Follow a design suitable for the foundation and local conditions.
-
Close the walls and install finishes: Proceed only after the relevant work has been inspected and the space is ready.
-
Finish the room: Install flooring, paint, lighting fixtures, storage and furniture.
Following this sequence helps prevent expensive changes and reduces the risk of hiding problems behind new finishes.
Final Thoughts
A basement renovation is an opportunity to make better use of the space you already own. Whether you want a family entertainment room, a quiet home office, a guest bedroom or a flexible space for changing household needs, the possibilities are considerable.
But the most successful projects begin with what you cannot see once the work is finished. Water management, air quality, insulation, electrical systems and safe exits deserve as much attention as flooring, furniture and paint.
Take the time to assess the existing conditions, plan the layout and understand the local requirements before construction begins. A little preparation now can help you avoid unnecessary expenses and create a basement that remains comfortable, functional and useful for years to come.


Comments
0 commentsNo comments yet. Be the first to share your experience.